
Texture alone does not mean an interior decorative board-and-batten wall needs backing. Start by deciding whether you want the texture to show between the strips. You also need to confirm that the wall and your chosen materials suit the installation.
The battens are the raised strips. Backing is a sheet material installed behind them to provide a different background surface. Without backing, the existing wall forms the background, so its texture remains part of the finished design.
If you want a smooth background, compare preparing the existing wall with adding smooth panels. Both involve work, but panels also bring the finished face forward. That matters where the treatment meets a baseboard, door casing or electrical fixture.
Start with the finish you want
Look at the open areas between the battens in the photos you like. Are they smooth, or can you see texture? These open areas are part of the finished design. Matching the spacing and paint color will not reproduce a smooth reference wall if your background remains textured.
You might be happy to keep light orange-peel texture, while a more pronounced finish could make the contrast with smooth trim distracting. That is an appearance preference. You still need to check whether the proposed installation suits your wall.
Check the wall in daylight and with the lamps you normally use. Texture may look different when light falls across it, so a straight-on phone photo is only part of the picture. DAP describes the way wall texture interacts with light and shadow.
Check the wall’s condition separately. Deliberate texture is different from a loose or damaged surface. Resolve peeling areas, existing damage or uncertainty about the substrate before choosing a covering. Adding a panel does not settle those underlying questions.
Compare three ways to treat the background
Use the same questions for each route: what will show between the strips, what preparation is involved, and what happens at the edges?
| Route | Background between battens | Main work to resolve | Effect at existing trim |
|---|---|---|---|
| Keep the texture | The current textured wall remains visible | Confirm the surface and attachment requirements for the trim and fixing method | No backing layer, but the battens still have their own depth |
| Prepare a smoother wall | The existing wall receives a smoother finish | Assess the surface and choose a suitable preparation and finishing process | No sheet backing; check the resulting finish at boundaries |
| Add smooth backing | The selected panel surface becomes the background | Choose suitable material, plan joints and confirm its installation requirements | The backing adds depth behind the battens |
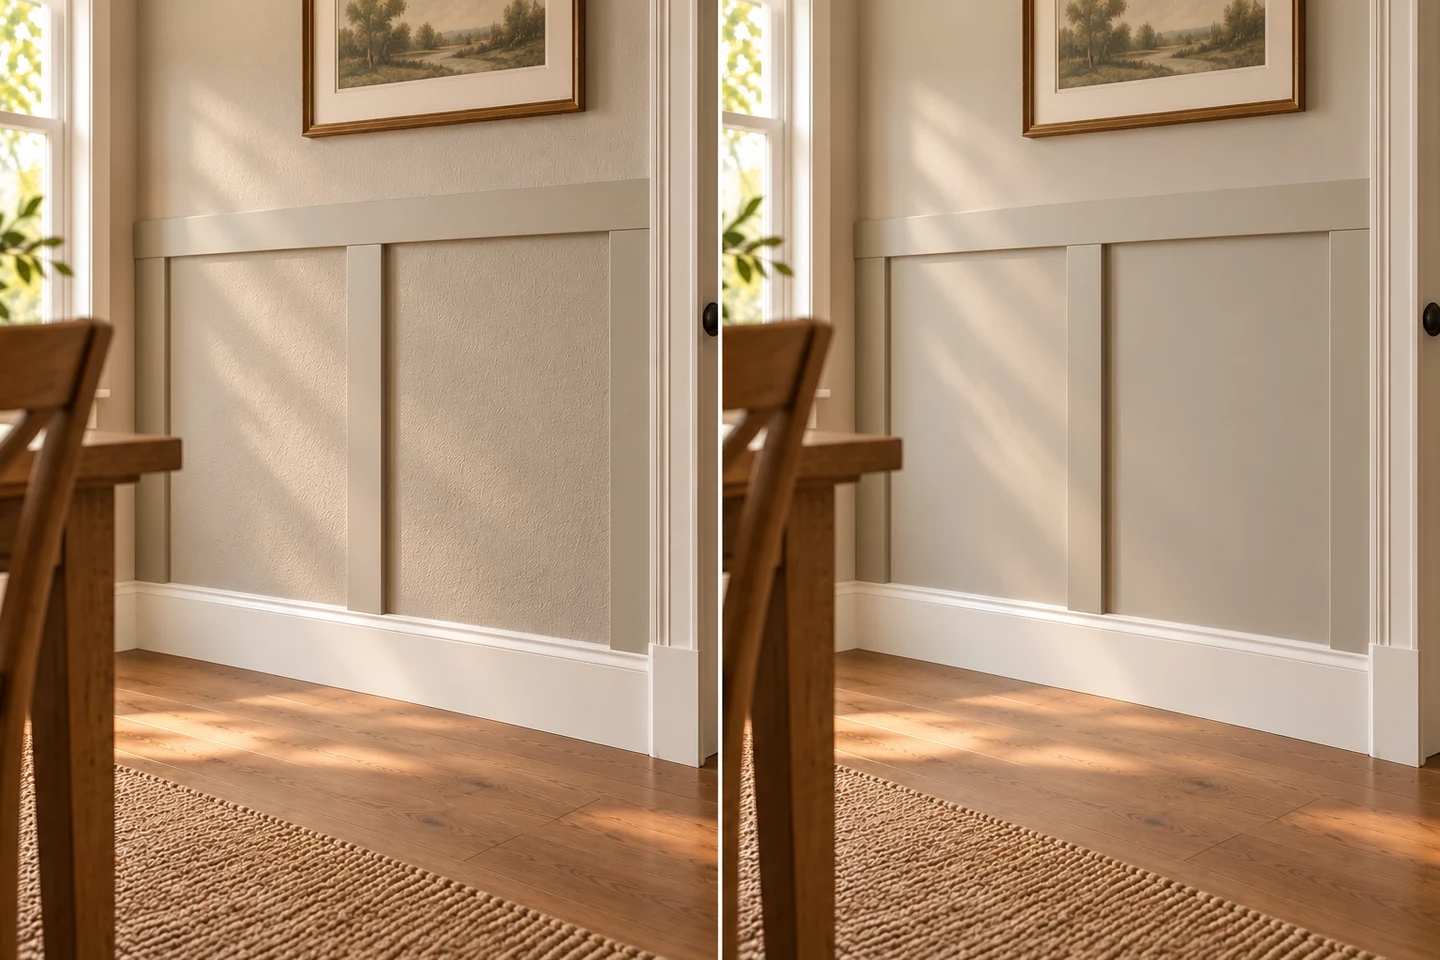
Texture visible
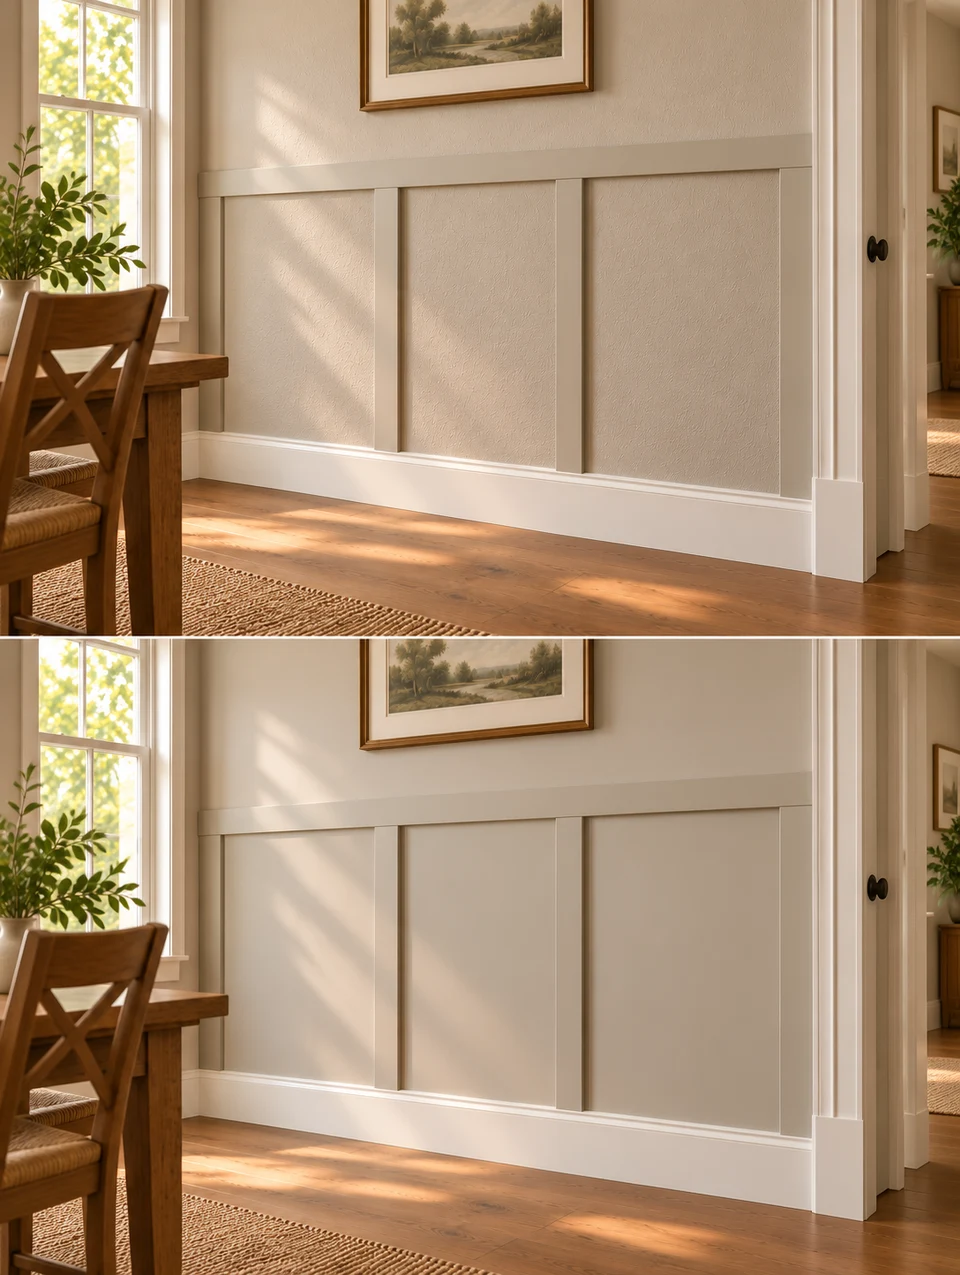
Smooth background
Keep the texture visible
Consider keeping the texture if you like it, or if a sample shows that you are happy with it beside the trim. You can then avoid adding a sheet background solely to change the appearance.
The visible result is still a textured wall framed by smooth strips. Painting both the same color can make them read as one treatment, but it does not remove the texture.
Hold a trim sample in its intended position and look along its edges. If it rocks or leaves a gap you would be unhappy with, resolve that detail before buying all the material. This checks appearance and fit; it does not prove that a particular adhesive or fastener will work.
There is no universal attachment recipe for every painted, textured wall. Follow the requirements for the selected trim and fixing method, including the permitted substrate and surface preparation.
Prepare a smoother existing wall
If you want smooth spaces between the battens but would prefer to avoid sheet backing, assess whether the existing wall can receive a suitable smoothing treatment.
Skim coating is one possible route. DAP’s textured-wall guidance describes smoothing texture with joint compound and notes that the work can be labor-intensive. Allow for that wall-finishing work separately from installing the battens.
Confirm the preparation requirements for your wall and its existing coating. A compound suitable for new drywall is not automatically suitable over the finish already in your room.
Ask what result the proposed work will achieve. A smoother surface does not establish that the wall has been made flat. Wider irregularities need assessment alongside the texture.
Add smooth backing
Backing makes the selected panel surface the visible background. Consider it when that is the finish you want and the added depth can work at the room’s boundaries.
Choose material intended for the proposed use and finish, then read its installation instructions before planning the whole wall. For example, DPI’s wall-panel instructions require firm, clean and dry surfaces and specify support requirements for their panels. Those requirements apply to DPI’s products; they are not a universal specification for every backing sheet.
Plan where panel joints will fall and how the chosen system treats them. Even if a batten covers a joint in your drawing, the manufacturer’s spacing and support requirements still apply.
The surface or supporting structure must still meet the selected material’s requirements. Backing does not automatically make an unsuitable wall ready for installation.
Check what backing changes at the edges
A smooth panel can look right in the middle of the wall and still meet existing trim awkwardly. Check the backing and batten together, using their actual thicknesses. Include any additional build-up required by the installation method; the two material thicknesses alone may not give the complete installed depth.
At a door or window, compare the front of that combination with the existing casing. Will the new trim finish behind it, level with it or project beyond it? If it projects, decide how that edge will end before treating the wall. A thinner-looking material in an inspiration photo does not answer that question for your room.
Make the same check at the baseboard. Backing may change how the batten meets its upper edge, even if the batten alone would have fitted. Our guide to board and batten with existing baseboards compares the junction choices in more detail.
For a partial-height design, decide how the backing ends at the top and at any exposed side. Include those boundaries in your material plan, rather than considering only the large panel faces.
Outlets and switches need a depth check too. Adding a layer changes the finished wall surface relative to an existing electrical box. Arlington’s box-extender information specifically addresses boxes set back from that surface. Have an electrician assess what the proposed treatment requires at your fixtures; a neat opening around a cover plate does not settle the box-depth question.
Compare a small sample before buying the full set
Compare samples where the treatment will go: hold the batten against the existing texture, then over the proposed backing. Keep the trim and intended color consistent so you can judge the background fairly.
- Check the open background. Look from a normal viewing position, then closer. Decide whether the texture bothers you in the room’s usual light.
- Check the strip edges. Look at how the sample meets the wall or backing, including any visible gaps or irregularity.
- Check an existing boundary. Hold the proposed material combination beside casing or at the baseboard. Include the backing layer whenever you are considering it.
- Confirm the installation requirements. Match the chosen material and fixing method to the actual surface. Resolve fixture-depth questions before committing to panels.
If you are comparing a professionally smoothed wall with backing, ask to see an appropriate finish sample or completed example. An unfinished sheet held against the wall cannot show the quality of a proposed skim-coated finish.
Before buying the full set of battens, settle the background finish and check its fit at the edges. You can choose to keep the texture, prepare a smoother wall or add suitable backing. Choose the route that gives you the appearance you want and works with the conditions in your room.